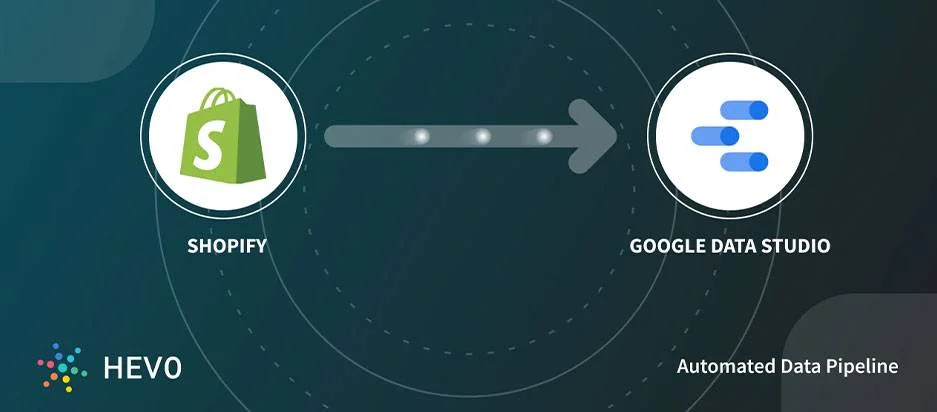
Google Data Studio is a powerful data customizable and reporting tool. If you run a Shopify-based business you can connect your Shopify to Google Data Studio and track your inventory, total sales, customer count, top-selling product, average order value, and so on.
A properly running Shopify store generates a lot of data every minute. To track this data in real time, you require a Shopify order cloud dashboard. Besides tracking your key metrics, the dashboard will reveal how the store is performing. Then you will know how to improve it. Now the question is: How to connect Shopify to Google Data Studio? Do not worry if you have no idea because we will reveal it in this article guide. Our step-by-step procedure will help with the integration process. We want to begin now, shall we?
Background information on Shopify
Some of you have a Shopify store and know what it is. As for the group that does not know, read on. Shopify is a renowned e-commerce platform that allows people to sell their products online. From setting up your web-based store to creating the point of sale to offering payment gateways, Shopify is so dependable. The eCommerce site is a comprehensive platform with desirable resources. You can sell on Shopify if you deal with:
- Digital products – These are items like podcasts, videos, audio files, eBooks, and tutorials.
- Tangible products – If you have an offline shop or warehouse with physical goods, you can also create a Shopify online store. It will help you use a streamlined shipping process after receiving payments online.
- Services – Are you a consultant who sells knowledge and expertise in any field? Shopify’s e-Commerce site can be your best friend after connecting Shopify to Google Data Studio.
- Memberships – Any kind of membership you deal with is easy to sell on Shopify. Whether you want people to become members of your Yoga classes, gym, cooking classes, or any event, you can reach customers via the platform.
- Leasing services – If you have a rental business dealing with houses, cars, gadgets, or something else, you need to set up a Shopify shop.
- Online classes – Maybe you are a massage therapist or a fitness expert who offers online classes. You can create powerful ads with Shopify.

Brief points about Google Data Studio
GDS happens to be a free visualization and reporting tool. Armed with an interactive order cloud dashboard, you can come up with excellent reports. Data Studio has a Data Sources feature that lets you pull data from various sources. It has over 240 in-built data connectors that can interact with live sources of data. Besides, GDS offers the Unlimited Reports feature, which lets you analyze as many reports as you wish. It also supports collaboration among teams because of its reports sharing feature. Thus, workers can work on one report in real-time. Furthermore, Data Studio provides several widgets to help you present data in an easy-to-understand manner. If you are not in GDS you are missing opportunities. Check out some of the advanced Google Data Studio reporting that will help you to make data-driven business decisions.
Connecting Shopify to Google Data Studio – Prerequisites
If you are now ready to learn how to connect Shopify to GDS, make sure you meet these simple requirements:
- You have basic knowledge of working with GDS. It has free tutorials and resources for newcomers. So, anyone can take the time to learn.
- You have worked with the Shopify platform before. If you have not, you can research it first.
- You have a Shopify account.
- You already have a Google account.
Now to begin the process, there are easy steps you should follow. They include the following:
Step One: Use a Power My Analytics data connector
If you are hearing about Power My Analytics (PMA) now, it is a third-party tool that can help you connect Shopify to GDS.
- So, create a PMA account and sign in to begin your free trial period
- Select your data source, which in this case is Shopify. Next, click on the Shopify Tile.
- Then, click on Data Sources.
Step Two: Add your Shopify account and Start GDS

- Choose Shopify from Data Sources and click on Add Account (1).
- After a Shopify account appears, click on Create Google Data Studio Report Button (2).
When Connecting Shopify to Google Data Studio, ensure that you have an API password. If you have no API password, you cannot do the Add a Shopify Account Step above. So, do the following to get it:
- Open a new tab and sign in to your Shopify admin area. Move to Apps, Manage private apps, and finally click on Create private app.
- Enter Power My Analytics under the Private app name. Then, under Emergency developer email, enter your email address.
- Shift to Admin API. Select Show inactive Admin API permissions.
- Shift to Customers and click on Read access
- Now copy the newly-generated API password, which is under Password.
- Return to your PMA hub tab. Enter your Store address and the Admin API password you have created.
- Click on Connect.
Step Three: Choose your PMA Hub and Shopify User Account
As a first-timer in connecting Shopify to Google Data Studio, there is something you should do first. As this could be your first time using DS and Shopify, you might have to authorize with Google. It will present this pop-up text: Data Studio requires authorization to connect data. So, click on Authorize.
- In this step, you should create a demo account. So, when you select your PMA Hub and Shopify User Account, also tick this box: Use report template for new reports. Click on NEXT.
Step Four: Create a Report in Google DS
- Next, when connecting Shopify to Google Data Studio, configure your Shopify hub and user account. Keep on clicking NEXT until you stumble upon the Connect button.
- Click on Connect to see a Shopify template with this message: You are about to create a new report with this data source. Then under Shopify, select the CREATE REPORT icon.
- Finish the process with Power My Analytics.
PMA vs. REST API method
Power MY Analytics provides the easiest way to connect Shopify to GDA. However, if you want to test your technical knowledge, you can choose the longer and more complicated REST API method. If you can code, choose this technique. If you cannot code, choose the straightforward method that requires null experience and effort.
Besides being a long process, the REST API technique is tedious. One has to keep on getting JSON data and adding it to their Google Drive. When having tight project deadlines, you can mess them up with this tedious process. Also, you have to extract e-Commerce data and set up the process in real-time. Converting JSON data is a big challenge because GDS does not offer in-built data conversion methods. So you may have to connect to a data warehouse or database first to change your data and load it again. If the data source alters the APIs, you should change your data and scripts to reflect those changes. This coder’s work can be complex.
New Shopify dashboard in GDS metrics
The first page of the dashboard will have a summary of the store’s performance. Just by checking this page, you can view your total sales, the total number of items you have sold, and the best-selling product you have. Again, the dashboard will present various scorecards showing your vital metrics. These metrics include total sales, average order value, items, orders inventory quantity, customer count, and inventory value.
From there, you can analyze each metric to understand what is behind the displayed number. For instance, when evaluating the total sales metric, you want to discover the vendor or marketing channel that contributes to the most sales. Under average order value or AOV, you can view the average amount of money that customers spend at your Shopify store. If you are not happy, you can offer discounts when a customer purchases from you many times.
Alternatively, you can ship items for free if a user reaches your threshold. As for the customer count metric, you can see customers who have bought from you over a given time. Inventory quantity shows the number of products still on the shelves, and inventory value discloses the total worth of your inventory.
Conclusion
This guide has valuable tips on connecting Shopify to Google Data Studio. As we have noted, it is easier to connect via a third-party tool like PMA than to work with the REST API. Without proper programming knowledge, you should opt for the automated method instead. We have presented every step clearly to help you understand and execute the connection process with PMA. As a beginner, you should try the no-code method to transfer your Shopify data to Data Studio for report creation. An alternative automated connector is Hevo, which has over one hundred data sources and a payment every month after the trial ends. It features Shopify and allows you to export and load data for analysis and visualization. So, make sure you connect your Shopify account to GDS via the simple PMA technique we have shared in this guide.
Either way, WooCommerce is a free eCommerce plugin for WordPress. If you’re a WordPress user you can also connect WooCommerce to Google Data Studio with the help of this guide.